Lists View
Lists View is the default contact organization mode in TextFlow. Lists are groups of contacts used for targeting campaigns and organizing your audience.
What are Lists?
Section titled “What are Lists?”Lists are named collections of contacts. A contact can belong to multiple lists, making lists ideal for campaign targeting and audience segmentation.
Examples of Lists:
- VIP Customers
- Newsletter Subscribers
- Prospects
- Toronto Customers
- High-Value Clients
Switching to Lists View
Section titled “Switching to Lists View”If you’re currently in Tags View, switch to Lists View by clicking the List Mode toggle in the top-right of the Contacts page.
Lists Sidebar
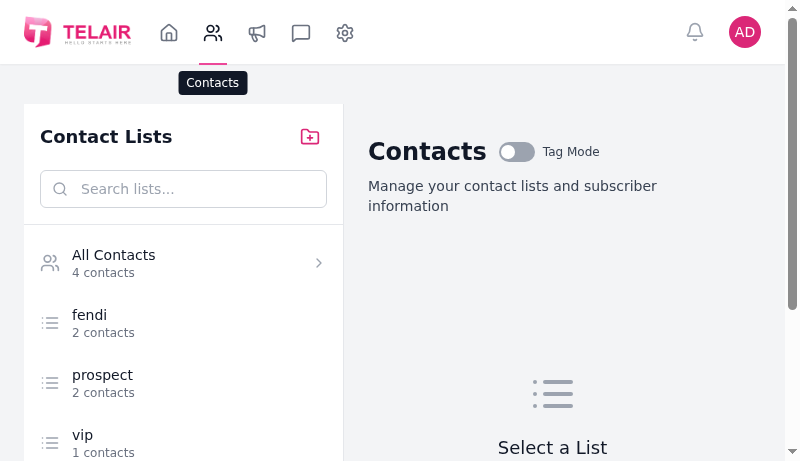
Section titled “Lists Sidebar”The left sidebar shows all your contact lists:
| Element | Description |
|---|---|
| Search bar | Filter lists by name |
| All Contacts | View all contacts across all lists (4 contacts in this example) |
| Custom Lists | Your created lists with contact counts |
| List Actions | Import, Edit, Delete buttons for each list |
List Examples
Section titled “List Examples”In the screenshot above, you can see several lists:
- fendi (2 contacts)
- prospect (2 contacts)
- vip (1 contact)
Creating a New List
Section titled “Creating a New List”- Click the + button in the sidebar
- Enter:
- List Name (e.g., “Summer Sale Prospects”)
- Description (optional, helps team understand purpose)
- Click Create List
The new list appears in the sidebar with 0 contacts.
Viewing a List
Section titled “Viewing a List”Click on any list name in the sidebar to view its contacts:
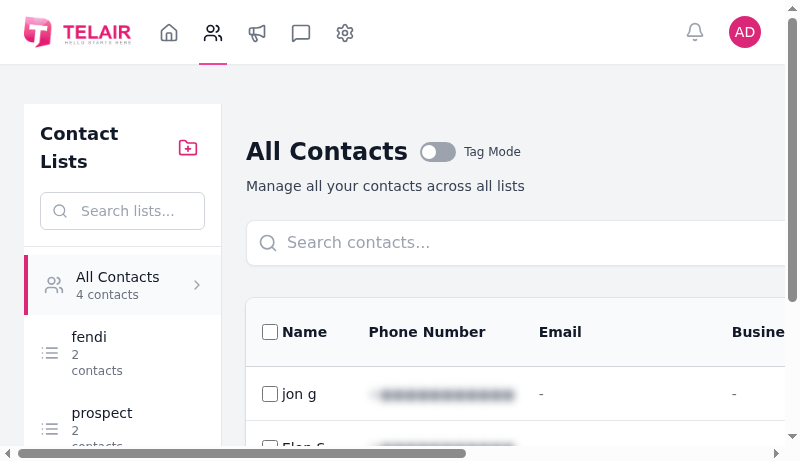
The main panel shows:
- List name and description
- Contact count
- Action buttons (Import, Export, Add Contact)
- Contact table with all list members
Contact Table Columns
Section titled “Contact Table Columns”| Column | Description |
|---|---|
| Name | First and last name |
| Phone Number | Primary phone number (SMS-enabled) |
| Email address (optional) | |
| Business | Company name (optional custom field) |
| Lists | Which lists this contact belongs to |
| Last Contacted | Date of last message sent/received |
| Opted Out | Whether contact has unsubscribed |
| Created | Date contact was added to TextFlow |
| Actions | Edit or Delete buttons |
Adding Contacts to a List
Section titled “Adding Contacts to a List”Method 1: Add Individual Contact
Section titled “Method 1: Add Individual Contact”- Click Add Contact button
- Fill in the form:
- First Name (required)
- Last Name (required)
- Phone Number (required, format: +1XXXXXXXXXX)
- Email (optional)
- Custom Fields (optional)
- Select Lists to add contact to
- Click Save Contact
Method 2: Import CSV
Section titled “Method 2: Import CSV”- Select a list from the sidebar
- Click Import contacts to this list
- Upload CSV file
- Map columns to TextFlow fields
- Review and confirm import
See Importing Contacts for detailed CSV import instructions.
Method 3: Bulk Add
Section titled “Method 3: Bulk Add”- Open All Contacts
- Select multiple contacts using checkboxes
- Click Actions → Add to List
- Choose destination list
- Click Confirm
Editing a List
Section titled “Editing a List”- Hover over a list in the sidebar
- Click the Edit icon
- Modify name or description
- Click Save
Deleting a List
Section titled “Deleting a List”- Hover over a list in the sidebar
- Click the Delete icon
- Confirm deletion
Removing Contacts from a List
Section titled “Removing Contacts from a List”Method 1: Delete from List View
Section titled “Method 1: Delete from List View”- Select the list
- Find the contact
- Click Delete icon
- Contact is removed from this list only (stays in other lists)
Method 2: Bulk Remove
Section titled “Method 2: Bulk Remove”- Select multiple contacts using checkboxes
- Click Actions → Remove from List
- Confirm removal
Using Lists in Campaigns
Section titled “Using Lists in Campaigns”When creating a campaign:
- Go to Campaigns → New Campaign
- In the Recipients section, select one or more lists
- Campaign will be sent to all contacts in the selected lists
Example: Select both “VIP Customers” and “Toronto Customers” lists to send a campaign to all VIPs and all Toronto customers.
List Best Practices
Section titled “List Best Practices”- ✅ Use descriptive names - “Q4 2024 Prospects” is better than “List 3”
- ✅ Add descriptions - Helps team understand list purpose
- ✅ Keep lists focused - One clear purpose per list
- ✅ Review regularly - Remove outdated or inactive contacts
- ✅ Combine for campaigns - Use multiple lists to target specific audiences
Lists vs. Tags
Section titled “Lists vs. Tags”Wondering when to use Lists vs. Tags?
| Feature | Lists | Tags |
|---|---|---|
| Organization | Fixed groups | Flexible labels |
| Contact Limit | No limit per list | Multiple tags per contact |
| Campaign Use | Direct selection | Filter-based selection |
| Best For | Campaign targeting | Detailed segmentation |
| Examples | ”Newsletter”, “VIP" | "toronto”, “interested-in-sale”, “high-value” |
Want more flexibility? Try Tags View.
Lists are the simplest way to organize contacts for targeted campaigns. Start with lists and switch to tags when you need more advanced segmentation.